This is a rough post i'll tidy up later!!
basically you will be writing an image to usb or sdcard on your laptop/pc.
then on the plug you setup uboot variable.
then you boot the media in the plug.
then consoled onto the plug you setup your software.
----------------------------------------------------------
Uboot settings are below for either sdcard or usb
#boot from usb
printenv
set bootargs 'console=ttyS0,115200 root=/dev/sda2 rootdelay=5'
set loadInitrd 'fatload usb 0:1 0x7400000 uInitrd-kirkwood'
set loadImage 'fatload usb 0:1 0x6400000 uImage-kirkwood'
set bootcmd 'usb start; ${loadImage}; ${loadInitrd} ; bootm 0x6400000 0x7400000; reset'
saveenv
#boot from sdcard
setenv bootargs_console 'console=ttyS0,115200, root=/dev/mmcblk0p2 rootdelay=5'
setenv bootcmd_mmc 'mmcinit; fatload mmc 0:1 0x6400000 uImage-kirkwood; fatload mmc 0:1 0x7400000 uInitrd-kirkwood'
setenv bootcmd 'setenv bootargs $(bootargs_console); run bootcmd_mmc; bootm 0x6400000 0x7400000'
saveenv
--------------------------------------------------------
Do this stuff from your laptop
#howto write an image to raw device! note the fedora image will resize upon boot.
xzcat (imagename eg>)f17arm-latest-arm-rpi-xfce-mmcblk0.img.xz |sudo dd bs=1M of=/dev/sdb(or other device)
#howto open terminal quickly to catch boot interupt
sudo chown uucp /dev/ttyUSB0; sudo cu -s 115200 -l /dev/ttyUSB0
------------------------------------------------------------
now put your stick in your plug and boot up!
initial root passwd for fedora is fedoraarm, do change the password
setup network
For static IP configuration you need to edit the following files using a text editor such as vi. Edit /etc/sysconfig/network as follows, enter:
# cat /etc/sysconfig/network
Sample static ip configuration:
NETWORKING=yes
HOSTNAME=fedoraArm
GATEWAY=10.4.50.5
Edit /etc/sysconfig/network-scripts/ifcfg-eth0, enter:
# cat /etc/sysconfig/network-scripts/ifcfg-eth0
Sample static ip configuration:
# Intel Corporation 82573E Gigabit Ethernet Controller (Copper)
DEVICE=eth0
BOOTPROTO=static
DNS1=208.67.220.220
DHCPCLASS=
HWADDR=00:50:43:01:c1:e6
IPADDR=10.4.50.30
NETMASK=255.255.255.0
ONBOOT=yes
Edit /etc/resolv.conf and setup DNS servers note you can't, it set by script
Finally, you need to restart the networking service, enter:
# /etc/init.d/network restart
To verify new static ip configuration for eth0, enter:
# ifconfig eth0
# route -n
# ping 192.168.1.254
# ping google.com
#To enable routing etc on laptop for allowing sheeva plug through my laptop over wireless. set eth0 to static 10.4.50.5
sudo sysctl -w net.ipv4.ip_forward=1
sudo iptables -t nat -A POSTROUTING -o eth1 -j MASQUERADE
#change password for root
passwd
#setup dev tools to build cgminer
yum groupinstall 'Development Tools'
yum install libusb libudev openssl-* ncurses-* libcurl-devel
mkdir /root/src
cd /root/src
#compile cgminer
wget http://ck.kolivas.org/apps/cgminer/cgminer-2.7.5.tar.bz2
tar -xvjf cgminer-2.7.5.tar.bz2
cd cgminer-2.7.5
CFLAGS="-O2 -Wall -march=native" ./configure --enable-bitforce
make
make install
#compile bfgminer
cd /root/src
wget http://luke.dashjr.org/programs/bitcoin/files/bfgminer/2.7.5/bfgminer-2.7.5.tbz2
tar -xvjf bfgminer-2.7.5.tbz2
cd bfgminer-2.7.5
./configure
make
make install
Friday, September 7, 2012

Friday, June 1, 2012
Tesla Coils, Magnifying Transmitter
Whilst I was looking into amateur radio I stumbled upon Tesla coils being used to transmit longitudal waves via a scalar field. It's a very different use from the popular use such as playing music and giving amazing light show
PLEASE NOTE ELECTRICITY CAN BE DANGEROUS DO SO AT YOUR OWN RISK I AM NOT RESPONSIBLE FOR ANYTHING YOU DO!
And with modern solid state circuit we can now use this effect at safer power levels, which is very different from when Nikola Tesla used spark gaps and very high voltage to produce this effect!
The great thing about scalar fields is you can communicate globally without creating radiation either via transverse waves employed in current radio technology or electromagnetic waves produced by wifi and microwave ovens. The trick is to find the resonant frequency of the coils you've wound. Now the expensive part is buying a function generator that can cover a wide frequency band.
The other option is to replicate the work of others which has the benefit of narrowing down the frequency band you need to scan to find the resonant frequency. A lot more information on the open source project can be found here I have to say that the manual seemed a little vague on some sections.
I've started my own build based off the information in the open source manual however I have used the materials i've had to hand or were easily accessible.


I totally changed tack and remade a set of coils more closely to the open source manual. Heres some photo's/screenshots from that setup. And as you will see I have a higher voltage on the receiver at two certain frequency ranges. Anything outside of that gives a lower reading than the transmitter!


PLEASE NOTE ELECTRICITY CAN BE DANGEROUS DO SO AT YOUR OWN RISK I AM NOT RESPONSIBLE FOR ANYTHING YOU DO!
And with modern solid state circuit we can now use this effect at safer power levels, which is very different from when Nikola Tesla used spark gaps and very high voltage to produce this effect!
The great thing about scalar fields is you can communicate globally without creating radiation either via transverse waves employed in current radio technology or electromagnetic waves produced by wifi and microwave ovens. The trick is to find the resonant frequency of the coils you've wound. Now the expensive part is buying a function generator that can cover a wide frequency band.
The other option is to replicate the work of others which has the benefit of narrowing down the frequency band you need to scan to find the resonant frequency. A lot more information on the open source project can be found here I have to say that the manual seemed a little vague on some sections.
I've started my own build based off the information in the open source manual however I have used the materials i've had to hand or were easily accessible.

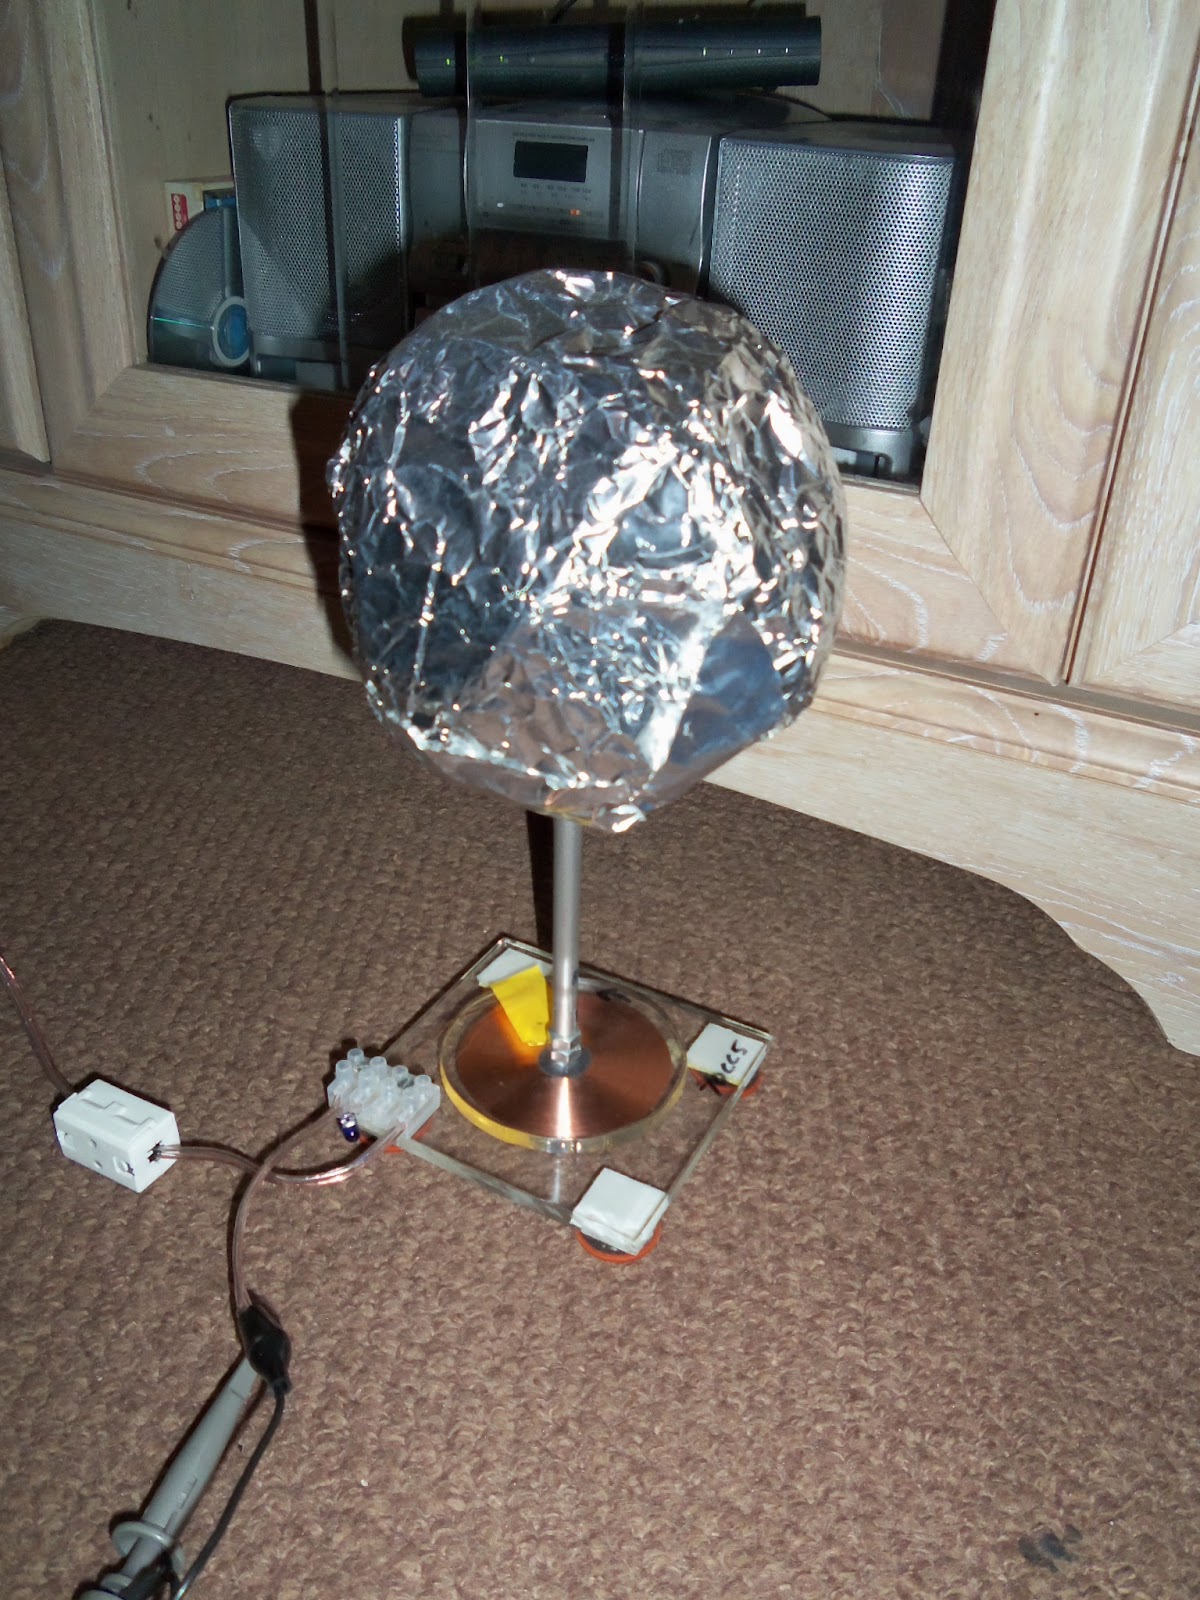
The ball shape is actually from a dome lamp made of glass, I covered it in foil and used aluminum tape to keep the flapping bits down. you could use zinc primer paint used in welding which is 90% zinc when dry!

The coil is made from approx 4mm copper tube, I will have to check the gauge later, The secondary (inner coil) has 18 windings and the primary has 5. The base board was made from scraps of wood I had left over. I fitted an M12 zinc threaded rod into a 10mm hole with bolts either side. I had to grind the top into a hex shape to screw it fully through the board.

Here is a rubber bung stuck on top to rest the glass domes on, I think they came out of a new washing machine (the restrainers for transit)
I totally changed tack and remade a set of coils more closely to the open source manual. Heres some photo's/screenshots from that setup. And as you will see I have a higher voltage on the receiver at two certain frequency ranges. Anything outside of that gives a lower reading than the transmitter!


Subscribe to:
Posts (Atom)