Wired up the controller temporarily, still getting issues with heat after putting in 10mm squared cable, seems to be in the brushes now.
Updates for 30th October 2014
Found a 48v 400a controller on ebay for £100, so going to use this for time being. It is made by Navitas and is commonly used in forklifts and golf carts.
Updates for 10th October 2014
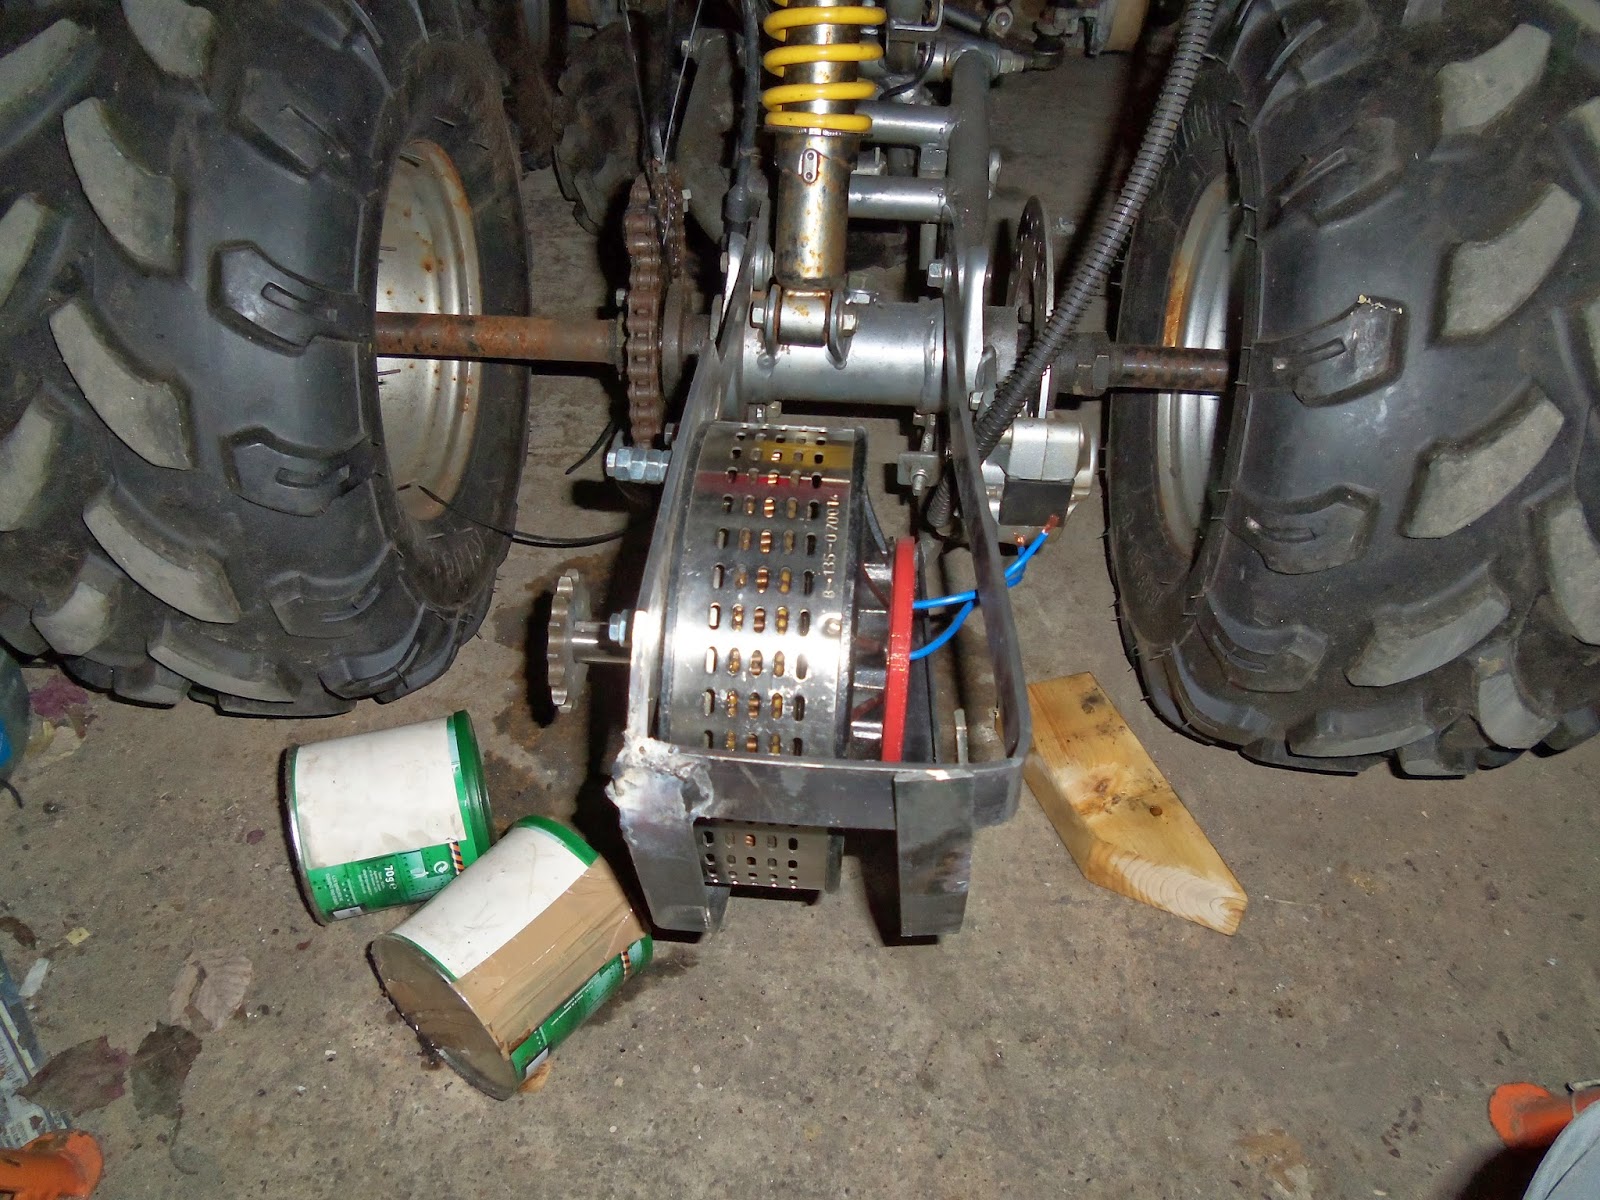
I had previously used a 3d printed part to hold the sprocket onto the motor which surprisingly held up at 12 volts. Well it lasted a millisecond when I tried 48 volts, hey ho I expected that.
One of todays tasks was to make the sprocket holder in metal. After wasting time with precision engineering firms etc I decided to start with a '1610 Powerdrive Taper bush' for less than a tenner with 6mm key steel.
I had to drill the bolt holes, so I used a couple of sockets and some card wrapped around to keep the bush and sprocket central, I then drilled through the sprockets bolt holes to mark where I needed to drill before removing the sprocket and finishing off the holes.
The next task was to fillet off one side to make clearance for the chain like in the models above. To do this I grabbed a long socket and put the bush on whilst holding this to a bench grinder allowing the bush to spin but not too fast, so some friction is required, so wear gloves or loose fingers!
The only other thing I had to do was counter sink the non chain side of the bolt holes as this bush is quite deep, I found out I had no space and the chain was out of alignment.
It is still very Heath Robinson at the moment, eg jumpleads are too thin so they get quite warm, my speed controller is a couple of bits of metal jammed into a pedal config hot glued onto the quad etc.
Todays run was at 24 volts, video is below enjoy!
I had an old faulty controller lying around so i'm going to give a new lease of life! It could never deliver enough current, so i'm going to use it as the driver for my bank of power mosfets. So far it is working on my bench, yay!
Updates for 5th October 2014
I wanted to test the drive train so I threw on a 12 volt battery and made a make shift foot pedal on off switch (it crackles a bit). You can see for yourself it goes just great (not fast with only 12v, 10+mph).
So now the next stage is to stretch out the frame to accommodate more batteries, rework brakes and steering positions and see where I end up.
Updates for 28th September 2014
Motor Mount finished and raised several inches
Chain shortened and tension adjusted
Project Started 9th of September 2014
Well I've took it upon myself to build an affordable electric vehicle, sure I'm not likely to have the luxuries of an automakers offerings, but I'm pretty sure I can do it for under a few grand!
Now due to some steep learning curves, I have not got the project to the point I was happy to post. However I have decided to just post some build pictures I have.
3D Scanning 'real world frame' into CAD
I will just point out that whilst I have successfully used a kinect sensor to scan a 3d image of the quad frame I'm remodeling, it has not been without frustration. So therefore I would recommend anyone attempting similar feats have high end CPU and a nvidia CUDA capable card to prevent despair of relocating to last position or software utterly loosing the plot at slow frame rates! I found 'ReconstructMe' to be better suited than 'Scannect'.
The other thing to note is the number of triangles in the acquired 3d scan, they will be in the order of 250k, you need this to be at 10k for certain cad programs to import natively else they will run at a turtles pace. Hopefully soon I will have concept drawings online!
I used Meshlab to trim out and cleanup the scan data, your best to do this with the high poly count(it will chug a bit), make sure to use the wire frame to spot hidden clumps (these waste your detail when you come to reduce the poly count later), I was switching between this and the standard view. when trimming I was mainly using the select faces, using 'esc' to switch into view orbit mode, 'ctrl' to add more selections, and 'alt' to select only viewable faces, and 'shift' to remove accidental selections. Once thats done I run 'Filters' > 'smoothing, fairing and deformations' > 'Laplacian Smooth' using defaults.
Then I run 'Filters' > 'remeshing, simplification and reconstruction' > 'quadric edge collapse decimation' set options as below, we are aiming for 10k polygons so it can import into other cad tools.
3D Scan data after cleanup and and splitting. Each section is only 10k polys so looks rougher.
.JPG)
.JPG)


.JPG)
.JPG)
.JPG)
.JPG)
.JPG)
.JPG)
.JPG)
.JPG)
.JPG)